
Open Chroma, generate the factory assets, and author your first palette and gradient asset ready to use in your project.
Chroma ships inside the Scylla package, so there is nothing extra to install. This page takes you from opening the window for the first time to having a saved palette and a saved gradient in your project, and shows you where each part of the tool lives. Plan on about five minutes.
Installation
Chroma is editor-only and ships inside the Scylla framework package as part of the ScyllaChroma.Editor assembly. You do not need a separate import step – if you already have Scylla in your project, Chroma is already there. If you have not yet installed the framework, start at Core Getting Started and come back here once the package is imported.
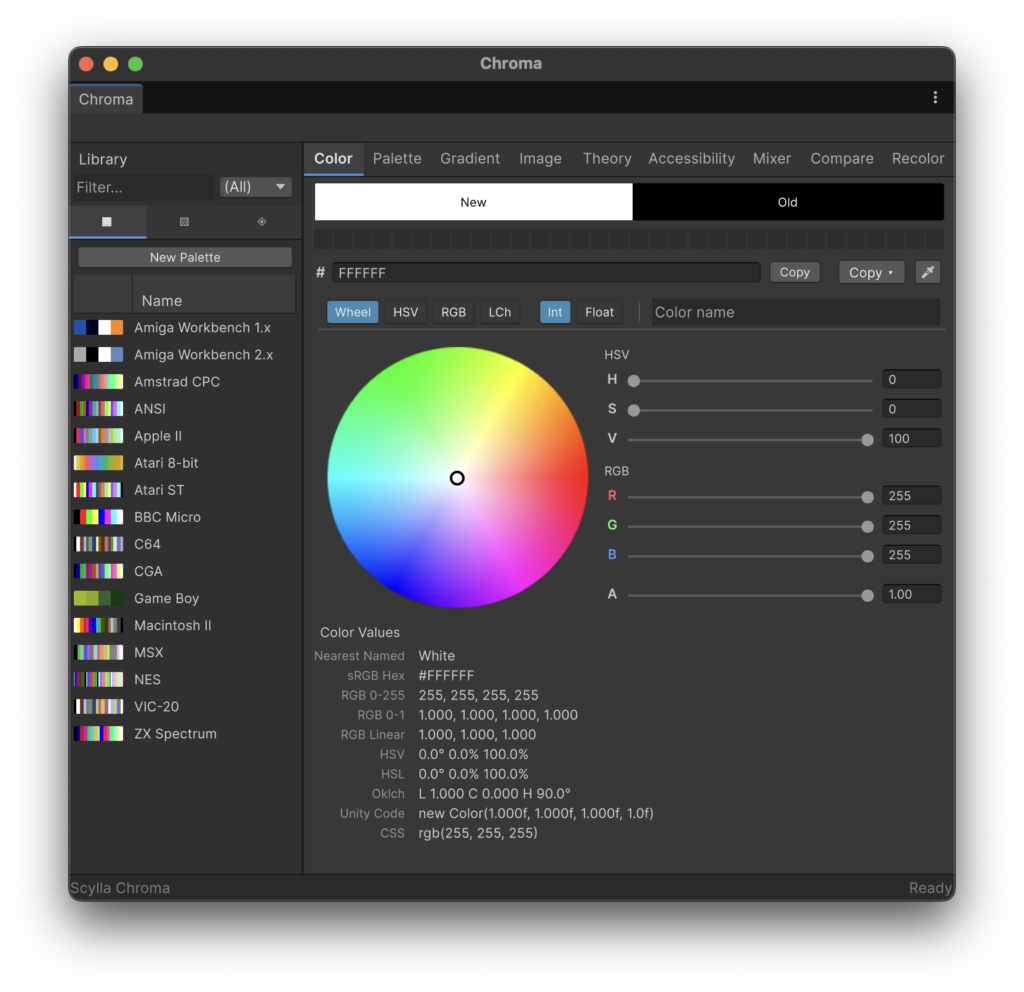
To open Chroma, choose Scylla > Tools > Chroma… from the Unity menu bar, or press Cmd+Shift+K on macOS / Ctrl+Shift+K on Windows and Linux. The window is free-floating and remembers its size and position across Unity sessions.
The first time you open Chroma in a fresh project, the library sidebar is empty. To populate it with Chroma’s bundled retro palettes and default gradients, open the window’s overflow menu (the three-dot button at the top-right of the window) and choose Create Factory Assets. Chroma generates the factory palette and gradient assets under the color directories configured in Project Settings > Scylla and the library sidebar picks them up immediately.
Setup and Configuration
Where assets land
Chroma reads its output directories from Project Settings > Scylla (not from per-user Preferences; that keeps the paths consistent for every contributor who works on the project). The defaults are:
| Asset type | Default directory |
|---|---|
ColorPaletteAsset | Assets/Scylla/Resources/Color/Palettes/ |
ColorGradientAsset | Assets/Scylla/Resources/Color/Gradients/ |
Factory assets land in those same directories. To change the directories, open Edit > Project Settings… > Scylla and update the color root, palettes subdirectory, or gradients subdirectory. The change applies to assets you create after that point; existing assets stay where they are.
In the Project window, find your palette and gradient assets at the paths above. Double-clicking either asset type opens it directly in Chroma (when the Auto-open on double-click preference is enabled, which it is by default).
The library sidebar
The left side of the Chroma window is the library sidebar. It has three sub-tabs: Palettes, Gradients, and Swatches. Each sub-tab lists the matching project assets with thumbnails. Drag an asset from the sidebar onto a tab to load it for editing. The divider between the sidebar and the right pane is resizable and its position is persisted.
Preferences
Per-user Chroma preferences live at Edit > Preferences > Scylla > Chroma. You can set the default named-color database, the transparency checkerboard cell size, and the auto-open behavior. Maintenance actions to clear the color history and favorites are also on that page. For a full breakdown see Preferences.
Usage
Build a palette
Click the Palette tab. Click New in the toolbar to create a fresh ColorPaletteAsset in the configured palettes directory. The new palette is also selected in the library sidebar so you can see the connection between the editor and the asset list.
Pick a color on the Color tab using any of the four 2D pickers (Wheel, HSV Square, RGB Cube, LCh Plane). The chosen color appears in the shared color preview strip as the “New” color. Switch back to the Palette tab and click Add to push that color into the palette as a new swatch. Chroma auto-names the swatch from the nearest entry in the configured named-color database.
Every swatch add, rename, sort, or removal is recorded as a Unity undo step and persisted to the asset file immediately – there is no separate save action.
For full palette authoring detail, see Palette Editor.
Build a gradient
Click the Gradient tab. Click New in the toolbar to create a fresh ColorGradientAsset in the configured gradients directory. The new gradient opens with two stops: black at offset 0.0 and white at offset 1.0.
To add a stop, drag a swatch from the Palette tab’s swatch grid onto the gradient bar – the stop lands at the offset under the cursor and takes the swatch’s color. Click anywhere on the bar to insert a stop at the current active color. The alpha rail sits above the gradient preview and is fully independent of the color rail.
As with palettes, every change is an undo step and saves to disk immediately.
For full gradient authoring detail, see Gradient Editor.
Sample colors from an image
Click the Image tab to open the image sampler. Load any readable texture from the Project window, then extract colors by clicking individual pixels, averaging a region, or running k-means dominant color extraction to automatically distill the image into a palette. You can drag a selection of extracted colors directly onto the gradient bar to seed a gradient from an image.
For full image sampler detail, see Image Sampler.
Using the assets at runtime
ColorPaletteAsset and ColorGradientAsset are standard Scylla Core asset types. They ship with custom property drawers, so wherever a field of either type appears in an inspector, you get an inline swatch strip or gradient bar preview plus an Open in Chroma button. For how to load and use these assets in your own code, see Palette and Gradient assets.